Once upon a time I had a little cupcake business.
This was before Hunter and I were married and I mostly just had a lot of fun with it!
I made cupcakes for bridal showers, weddings, birthday parties, baby showers, events... you name it!
There was something so fun about creating new flavors and topping them to look cute.
However, I never actually really ate said cupcakes.
I would try a few here and there and lick the spoon when I was done with the frosting, but I mostly just did it for my customers.
When I married Hunter I quickly found out that he is so not a cake person.
He would prefer a cookie over a slice of cake any day.
Even though I still love to bake cupcakes, I quickly found myself falling in love with the different types of cookie combinations out there.
I started baking new creations every Sunday and we would judge each of them.
Hunter's favorite is hands down peanut butter and mine is butterscotch oatmeal!
Now our tiny person absolutely loves cookies too!
She asks for a "tookie" almost every day now... oops!
If I could make cookies every day, I totally would ;)
Usually when I make cookies I'll bake half the dough and freeze the other half for the next week.
That helped eliminate some waste since there's no way our little family can or should finish a dozen cookies.
However, our cookies still got stale and ended up in the trash after about 24 hours if i left them out.
I've always loved the idea of a cookie jar but couldn't find any I liked.
I just wanted a simple jar that was easy to open and had plenty of room to store the cookies.
I found a glass one at Walmart for super cheap, but just felt like it was missing something.
I wanted my cookie jar to actually say "Cookie" somewhere on it so I didn't end up putting a million other unnecessary things in it... yeah that's totally how I clean ha. If something is empty I just put more stuff in it!
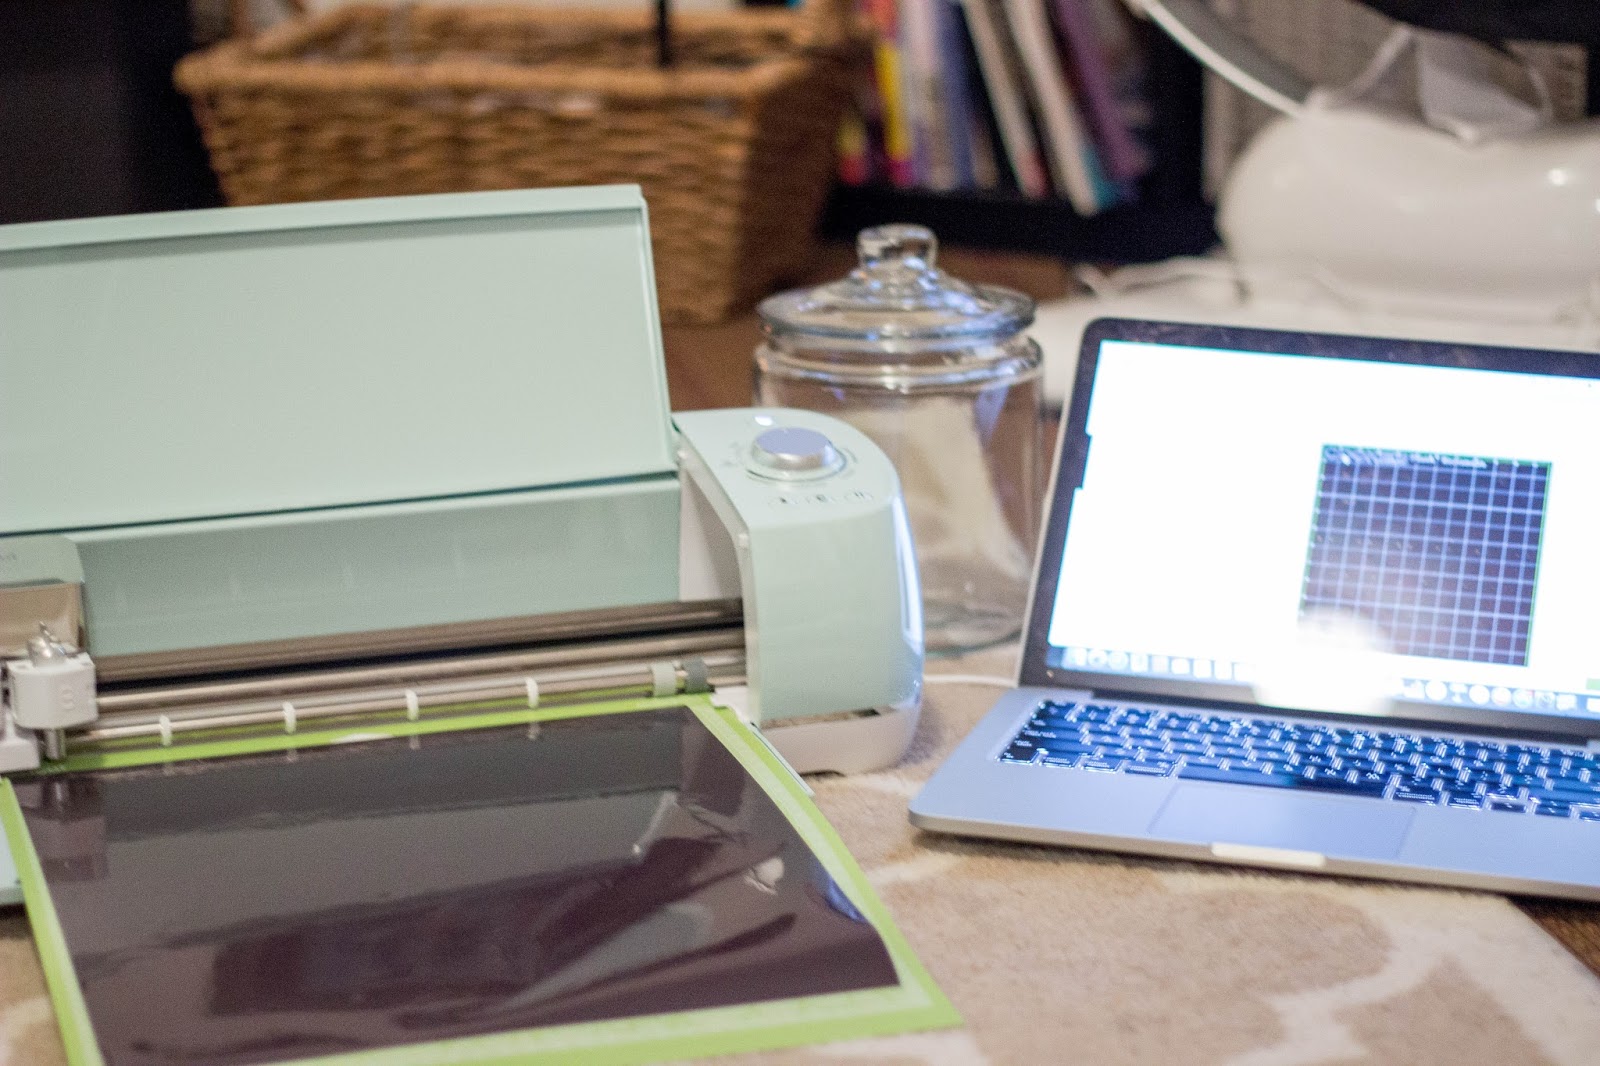
You guys, how have I lived my life without a Cricut for so long??
These things are so cool!
I'm now realizing how much time I've wasted in the past on crafts.
Seriously, my Cricut makes crafting SO easy!
I've made this personalized cookie jar, a card, a shirt for Oaklyn, a few little decor things, and I'm already planning out some onesies for our new little girl!
While all of the Cricut machines are amazing, this particular model cuts and writes up to two times faster than older models and even has a "fast mode!"
Now get ready for all the rest of this info because trust me... you need this thing!
The Explore Air 2 gives you the ability to c
reate on your computer, tablet, or smartphone and will send your design to your machine to print, cut, or write.
It has an Embedded Bluetooth® for wireless cutting, can cut 100+ materials from vellum to leather, has a smart Set® dial for easy material settings, includes a double tool holder for cutting and writing or cutting and scoring in one step, has Cut Smart® technology for precision cutting and easy and pre-calibrated material selection, allows you to upload and use your own image files or fonts for free, and has integrated storage compartments.
You guys, it's seriously amazing!
There is also an image library with over 3,000 ready to make projects if you need a little help coming up with creations.
There are seriously soo many ways to use a Cricut and I have no doubt you will quickly fall in love with it just as much as I did!
Not only do I love the finished product but I couldn't believe how easy it was to make.
I very easily designed the look of it in Cricut Design Space and in seconds it was sent to my machine and printing.
I was also so scared it wouldn't transfer easily but was amazed at how easy it was!
Trust me, if I can do it... you absolutely can!
Make sure to Check out
Cricut and explore all their amazing machines because you definitely will not regret it!
As for the recipe of these amazing cookies... you're going to want to make these asap as well ;)
Ingredients:
-1 cup softened salted butter
-1/4 cup white sugar
-1 cup brown sugar
-2 tsp. vanilla
-2 eggs
-1 package vanilla instant pudding mix
-1 tsp. baking soda
-2 1/4 cups flour
-1/2 cup old fashioned oats
-1/2 cup butterscotch chips (more or less)
Directions:
1) Cream together the softened butter and sugars with a stand mixer or beaters until light and fluffy.
2) Add vanilla, eggs and the pudding mix and continue mixing.
3) Next add in your baking soda and continue mixing.
4) Start slowly adding in the flour and mix gently.
5) Add your chips and oatmeal to the batter and mix a minute longer.
6) Use a small cookie scoop (mine is from Wilton) to drop dough onto a very lightly greased cookie sheet. Or just drop by the spoonful ;)
7) Bake your cookies for 8-10 minutes at 350 degrees until the sides are slightly golden.
8) Remove the sheet from the oven and transfer cookies over to a wire cooling rack if you have one
9) Store leftover cookies in your new cookie jar!
I hope you forgive me for missing Tasty Tuesday this week now since I technically still posted a recipe ;)
And seriously, run over to the Cricut website and get yourself a new present... you deserve it ;)
All my love,
Aleigh Joy


.JPG)